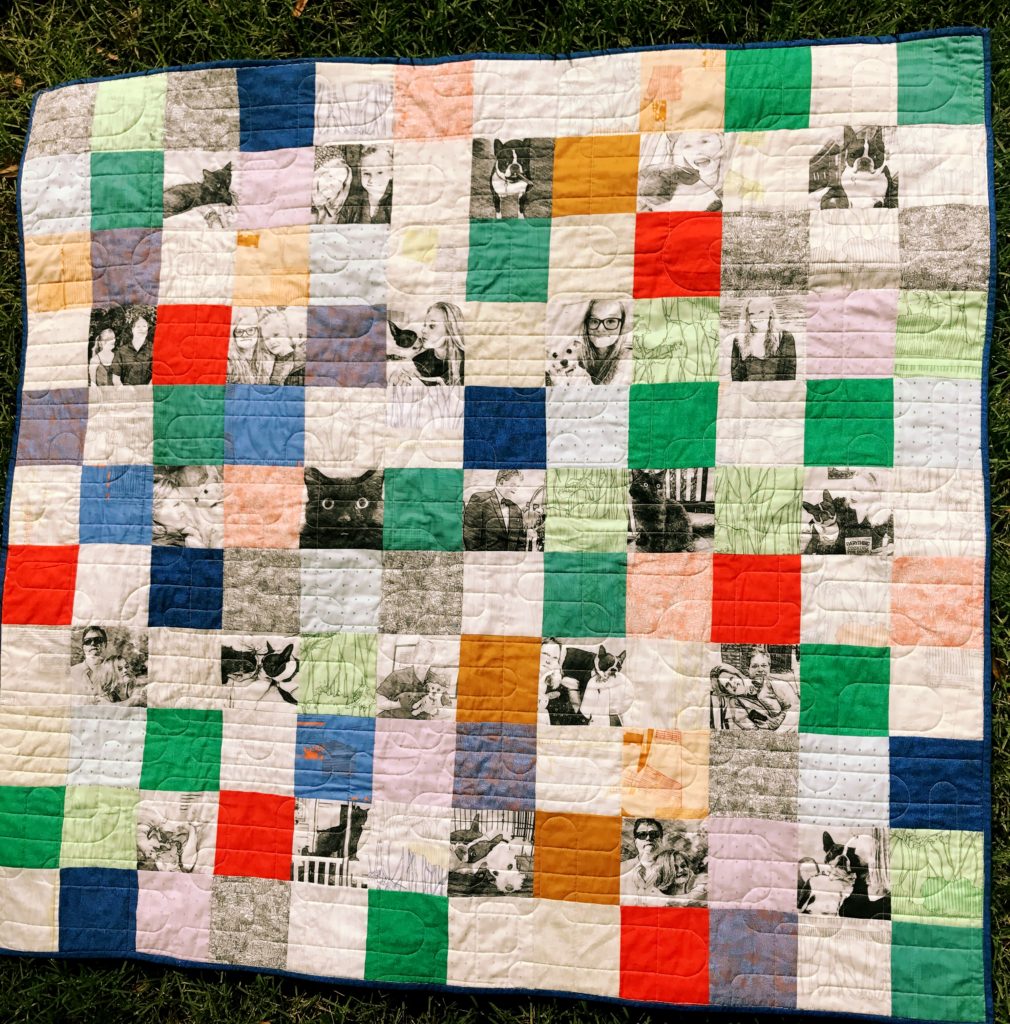
This post is Step Three & is the final post in the Tutorial for the Sketches Throw Quilt. Step One of the Tutorial is about creating the Photo-Designs using an App and Step Two of the Tutorial is about uploading the Photo-Design to Spoonflower for printing. This final post, Step Three, will provide the simple pattern for making the quilt.
To recap, the Sketches Throw Quilt is a very simple four patch quilt with a creative twist. It uses fabric you’ve designed with your Photo-Design. You can read more about what a Photo-Design is here, in Step One.
Since my quilt patterns involve some work on the front end preparing your Photo-Designs, you can be assured that the actual quilt pattern will be EASY. These patterns are great for beginners and for experienced quilters, a nice quick project. So keep reading for the wicked simple Sketches Throw Quilt Pattern.
STEP THREE – Make the Quilt using the 25 Photo-Designs
QUILT OVERVIEW. Finished Quilt Size: 54” wide x 49.5” (apprx’)
Fabric Needed: Quilt Front – this quilt is designed to use charm squares (5″ square) so you will need 107 5″ charm squares . I used 3 Charm Packs & had squares left over; I used “Friedlander”, from Robert Kaufman by fabric designer Carolyn Friedlander’s. This fabric design has an artistic vibe which was what I was looking for to pair with the Pencil Sketch Photo-Designs. Carolyn Friedlander is one of my favorite fabric designers, and one of the many that I follow on Instagram. You will also need 25 Photo-Designs, each trimmed to charm square size (5″ square). Quilt Back – 3/12 yards Binding – 1/2 yard. Seam allowances are 1/4 inch, unless noted otherwise.
CUTTING. Trim the Photo-Designs to be 5″ squares. Assuming you are using charm squares, this is all the cutting you will do. If not using charm square, then cut 107 5″ squares.
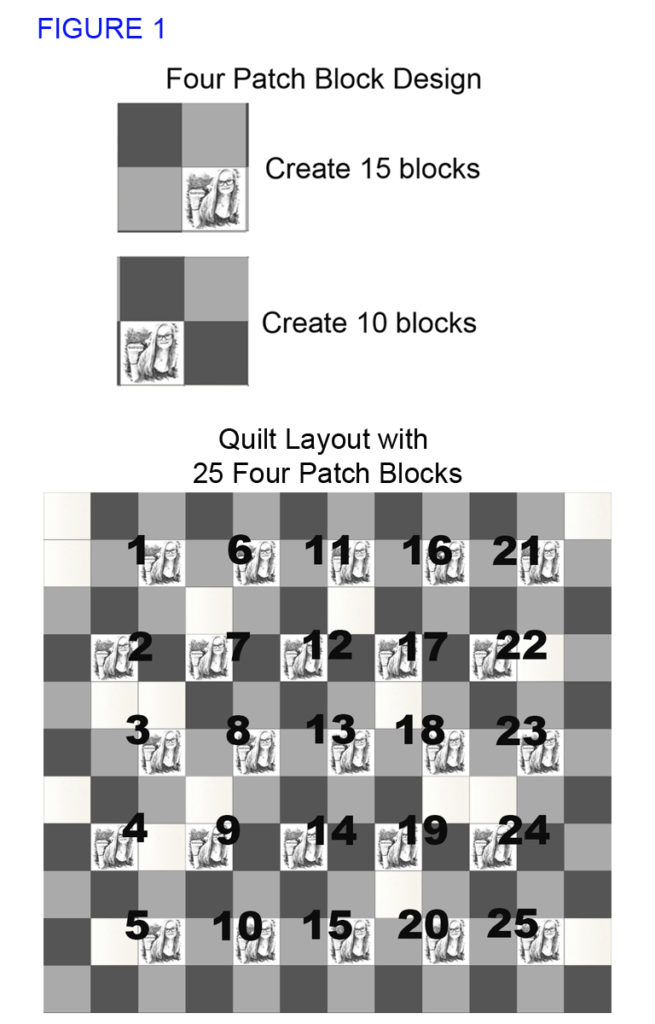
PIECING THE FOUR PATCH BLOCKS. Sew together a four patch block, using three charm squares (5″ square), and one 5″ inch Photo-Design per block. Make 25 four patch blocks, following the layout below (Figure 1). Vary the charm square blocks, to your liking.
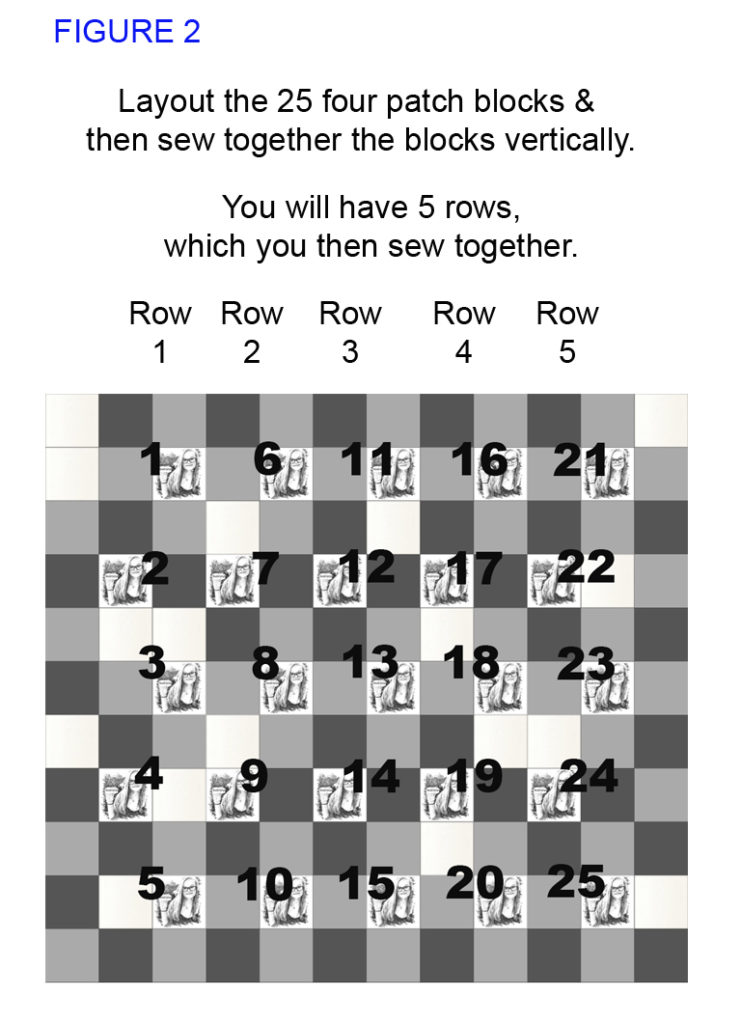
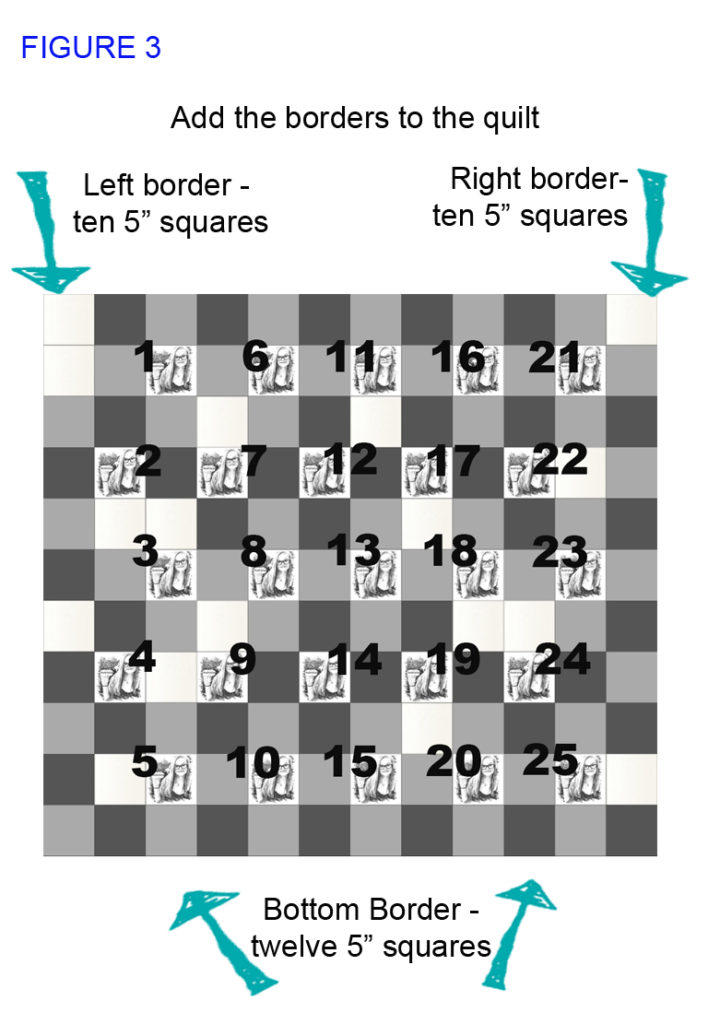
ASSEMBLING THE QUILT TOP. Take the blocks and arrange them into five vertical rows, with each row having five blocks. Then sew together the 5 rows to complete the quilt centre (Figure 2). To create the quilt “border”, for the left and right side of the quilt centre, sew two sets of 10 charm squares (5″ square) together vertically, and then join one set to each side of the quilt centre For the quilt “border” on the bottom of the quilt, sew one set of 12 charm squares (5″ squares) together horizontally and then sew to the bottom of the quilt centre to complete the quilt top (Figure 3).
QUILTING AND FINISHING. Cut the backing fabric, and press the quilt top and backing well. Make a quilt sandwich by placing the backing fabric right side down; the batting on the top and then the quilt top centered on top with right sides up. Baste using the method you prefer, quilt and bind.
