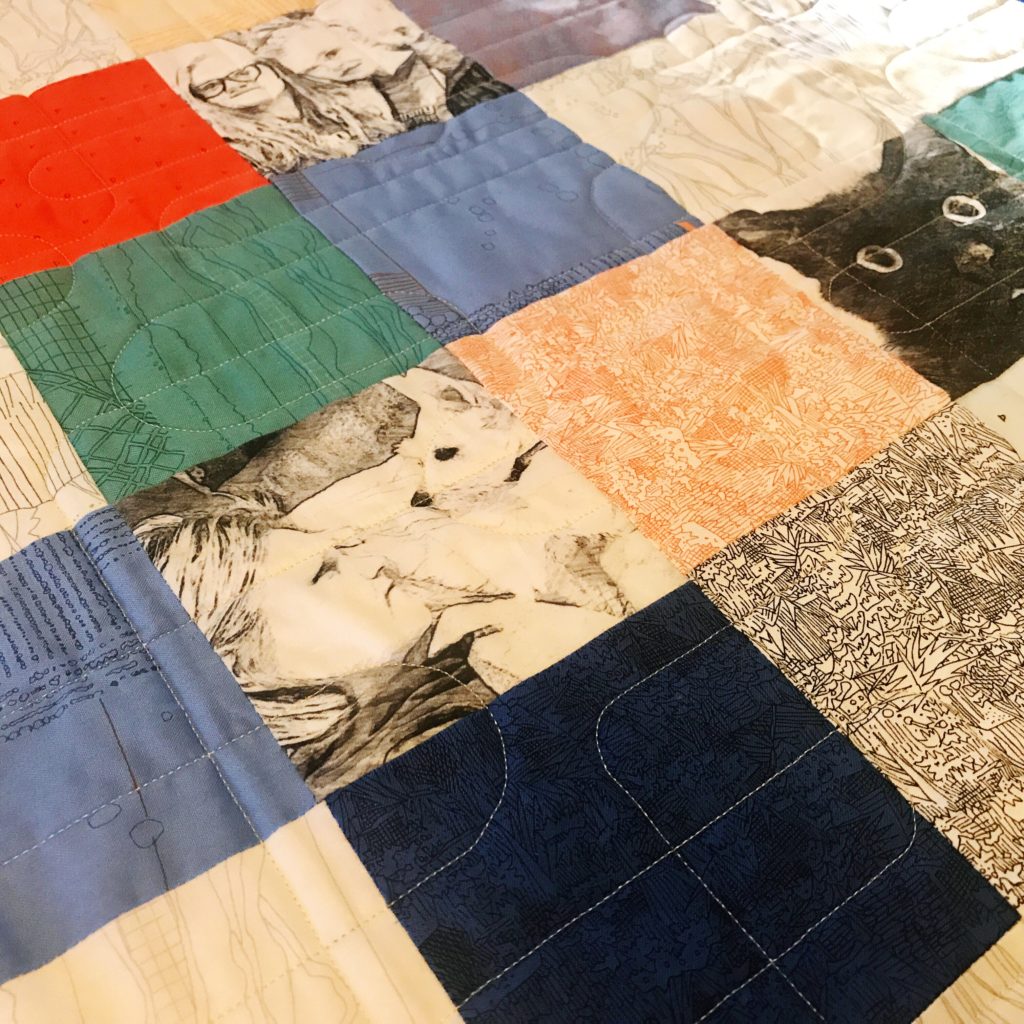
This post is Step Two in the Tutorial for the Sketches Throw Quilt. You can find Step One of the Tutorial here. The final post, Step Three, will provide the simple pattern for making the quilt, & will be ready in a few days. I decided to break this Tutorial up into three posts, as I figured it would be easier to digest, & if needed, refer back to in the future.
To recap, the Sketches Throw Quilt is a very simple four patch quilt with a creative twist. It uses fabric you’ve designed with your Photo-Design. You can read more about what a Photo-Design is here, in Step One.
SKETCHES QUILT TUTORIAL
STEP TWO- Uploading the Photo-Design collages to Spoonflower
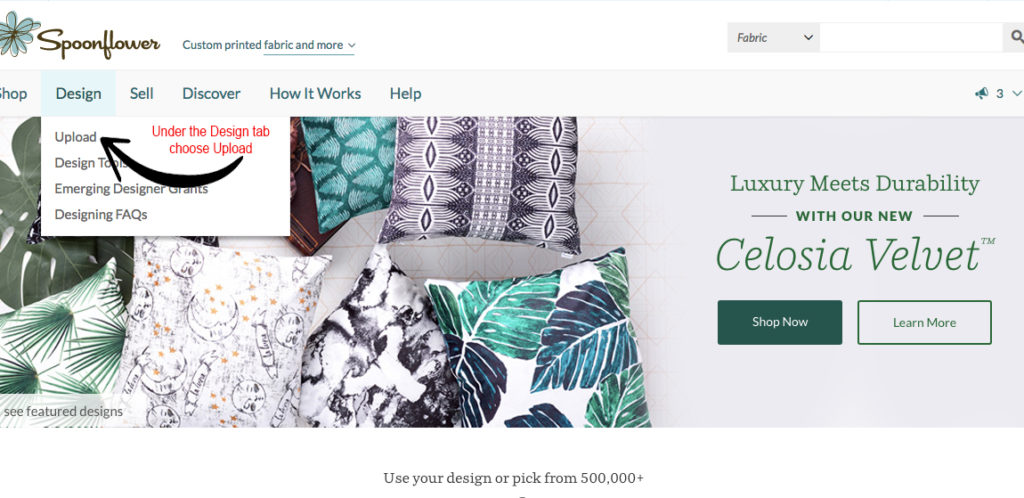
1. UPLOAD TO SPOONFLOWER: Head over to the Spoonflower website. I have done this part on my smart phone, iPad and computer. Either works fine. Obviously having a larger screen for this process does help, so I usually will use my iPad vs my iPhone. Click on Upload, which is under the Design tab.
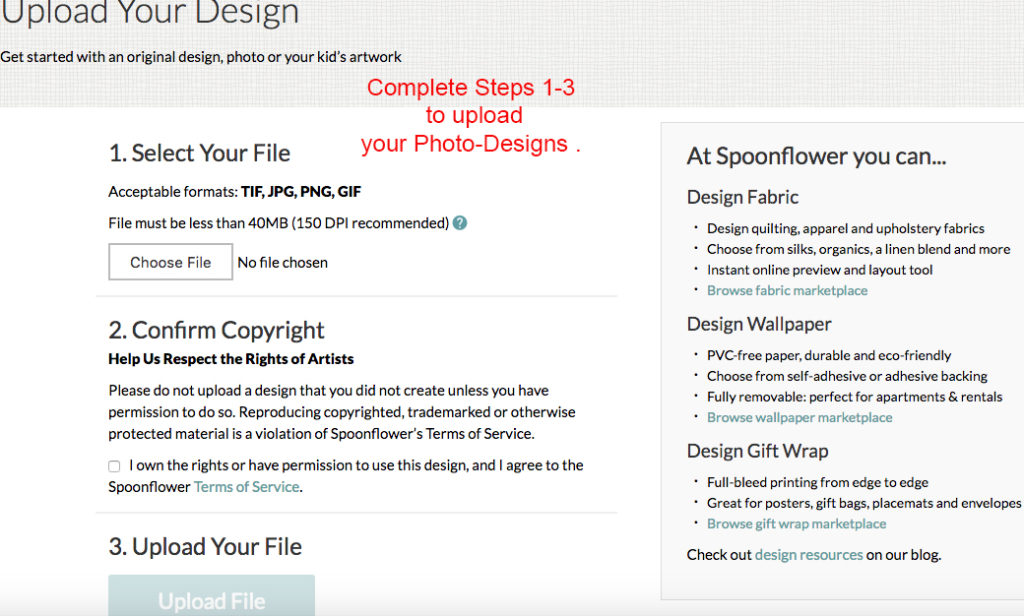
2. COMPLETE THE THREE STEPS ON THE UPLOAD PAGE: Follow steps 1-3 on the Spoonflower upload page. The file type that you should be uploading is a JPG. Spoonflower will accept 4 files types, a TIF, JPG, PNG or GIF. Images saved on a smart phone or ipad are JPGs, so that is what you will be uploading.
3. ENSURE THE PHOTO-DESIGN BLOCKS ARE APPRX’ 6 INCHES: when you upload the Photo-Design collage, it should upload so that each Photo-Design block is approximately 6″ in size. If it isn’t, you can change the DPI(dots per each) to adjust the size. Increasing the DPI will make the block size smaller. You may have to play with this a bit. For printing purposes, the DPI can not be lower than 150 DPI. You can read more about DPI and printing with Spoonflower here.
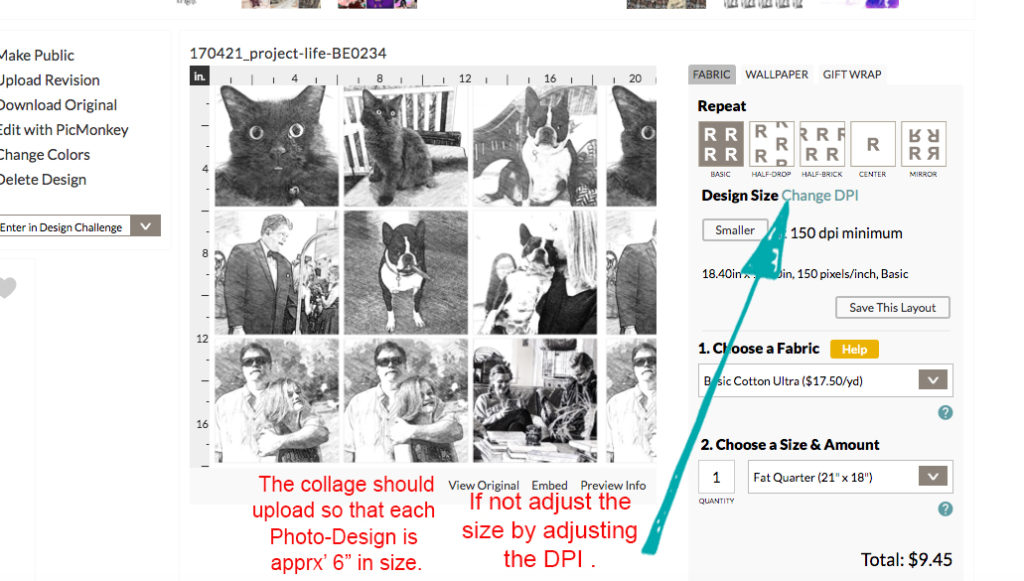
4. CHOOSE THE TYPE OF FABRIC & SIZE: choose the type of fabric you want to print on; I’ve always used the basic cotton. Also choose the fabric size, which will be a fat quarter. Select ADD TO CART and finish the purchase process. As I noted earlier, shipping is $1.00 if you choose standard shipping, which is 12-14 days. I usually go with this option and usually get it in 7-10 days.
That’s it for Step Two of the Tutorial. Pretty easy. The last post in this Tutorial, Step Three, will have the pattern for making the Sketches Throw Quilt.


