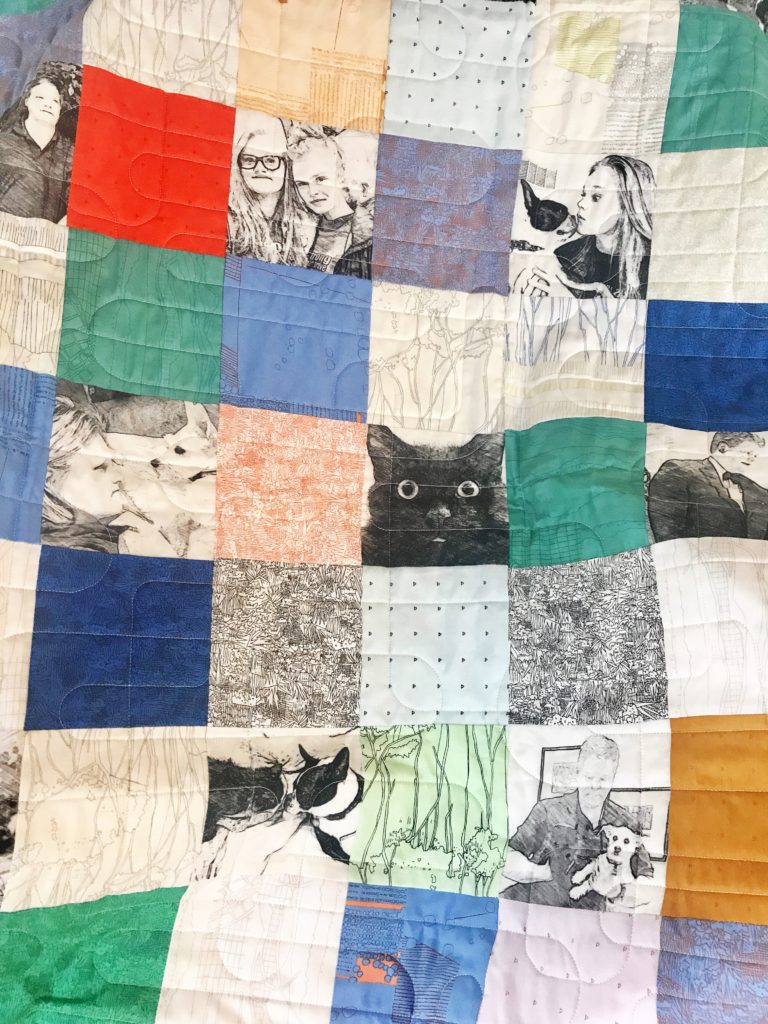
I’m excited to share this tutorial with you for Sketches, a Throw Quilt. It’s a very simple four patch quilt with a creative twist. It uses fabric you’ve designed with your Photo-Design. What it is a Photo-Design you ask? A Photo-Design is what you create when you take one of your digital photos (like all the ones you have on your smart phone!) and transform it into a design using an App on your smart phone or iPad. Here’s an example –
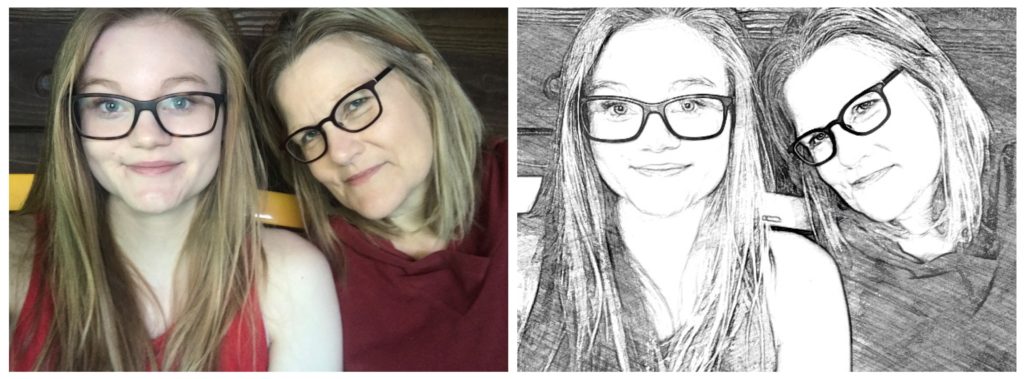
On the left is a photo taken on my daughter’s iPhone. On the right, is the Photo-Design I created with that photo using an App on my iPhone. Before we had Apps on our smart phones, we had to rely on complex programs like Photoshop to create these incredible designs using a photo. Here is one I did years ago in photoshop. Believe me this didn’t happen with a few clicks. It took many adjustments in photoshop.
Now, it’s VERY simple with a few clicks on your smart phone or iPad using an App. Combine this with the various on demand fabric printing services, such as Spoonflower, and voila – you’re creating custom fabric, using your photos that have been transformed to amazing Photo-Designs. For us quilters, this opens up a whole new world of possibilities that allows us to do something creative and unique with the oodles of photos sitting on our smart phones.
 I’m sure wondering this – Why not just print the photo “as-is” on fabric and skip the process of transforming a photo to a Photo-Design? My answer to that question is this: photos printed on fabric just look plain cheesy, especially if you’re wanting to incorporate them into a quilt. Transforming the photo into a Photo-Design lets you create a graphic or design that will not stick out like a sore thumb when combining it with fabrics. Converting the photos to a design using an App accomplishes this. I can tell you that the design possibilities are endless, given the multitude of Apps that are available, and the unlimited supply of photos we all have. This tutorial will be in three separate posts, so let’s dive into the first post/first step of this tutorial – creating the Photo-Design.
SKETCHES QUILT TUTORIAL
STEP ONE – Creating Photo-Designs with an App
1. CHOOSE YOUR PENCIL SKETCH APP: For this quilt, I used an App that produced a pencil sketch design. There are multiple pencil sketch Apps out there, both for iPhone and Android. I have an iPhone, and used this App – Pencil Sketch 2 from Duan Yunyong.
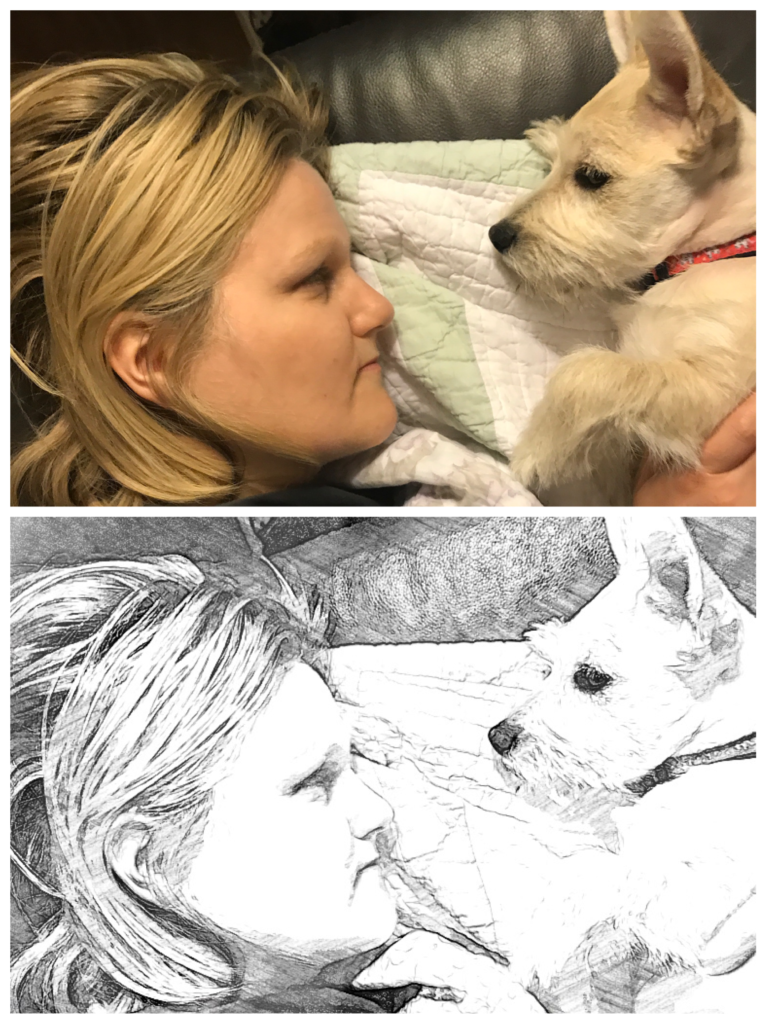
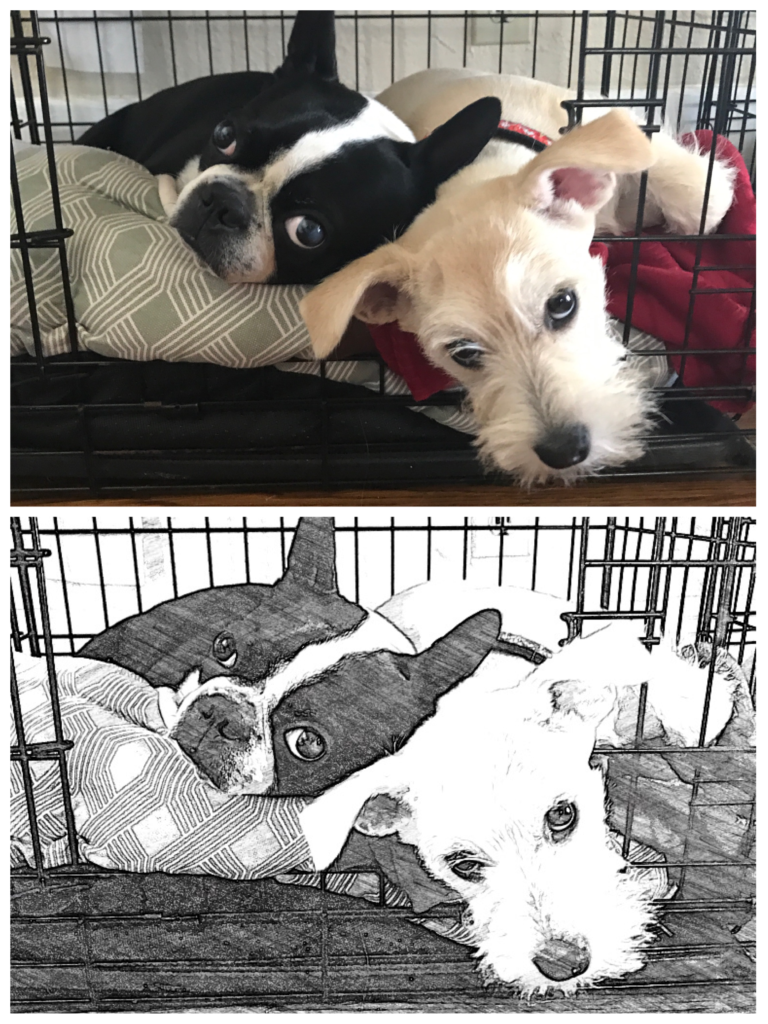
From my experience, this pencil sketch App worked with just about any photo. Selfie photos, landscape photos, you name it. It has multiple sketch designs within the App, and most of the time I ended up using one of these sketch designs: (1) Pencil Sketch (the very first one), (2) Brush 20 (3) Brush 2 (4) Brush 25 of (5) Brush 26. Make sure to use the toggle switch on the left to adjust the intensity too. Here’s a few more examples:
2. CREATE THE PHOTO-DESIGNS: For this Quilt you will need 25 Photo-Design blocks that will be trimmed to 5″ blocks. When choosing what photos to use, keep in mind that the Photo-Designs will be printed as roughly 6″ blocks (if you use the process I’ve outlined below in #4 of this STEP ONE) but you will trim them to 5″ blocks. Since they will also be sewn into a 4 patch block, so allow a quarter inch all around the block for seam allowance. Don’t freak about this. Just make sure that the important part of the photo isn’t on the edge of the photo. I really haven’t had a problem with this. Also remember you are creating a design, and not using a photo in your quilt, so we’re not going for perfectly framed photos.
You’ll be able to print 27 (using the process I outline below in #4 of this STEP ONE) so prepare 27 Photo-Designs. Get busy creating those Photo-Designs on your smart phone or iPad. For me, this is the funnest part. Save the Photo-Designs on your smart phone’s photo library.
3. DECIDE HOW YOU’RE GOING TO PRINT THE PHOTO-DESIGN ON FABRIC: I use Spoonflower – there are other companies, such as Design Your Own Fabric, or Fabric on Design, but I haven’t used them. You can also print using your own printer, but this tutorial won’t address that process. Instead, I will walk you through the process I use to print with Spoonflower. So the remainder of the directions in this tutorial are specific to using Spoonflower.
With Spoonflower, you can print a fat-quarter size piece of fabric (21′ x 18″) for around $10.00. Shipping is $1.00 if you choose standard shipping, which is 12-14 days. I usually go with this option and usually get it in 7-10 days.
4. CHOOSE PHOTO COLLEGE APP: Using a Photo-Collage App, you will take the Photo-Designs and create a 9 square/block collage with them. This is what will be uploaded to Spoonflower. You will NOT upload 25 individual Photo-Designs; instead you will upload 3 collages, each containing 9 square designs. A collage will look like this:
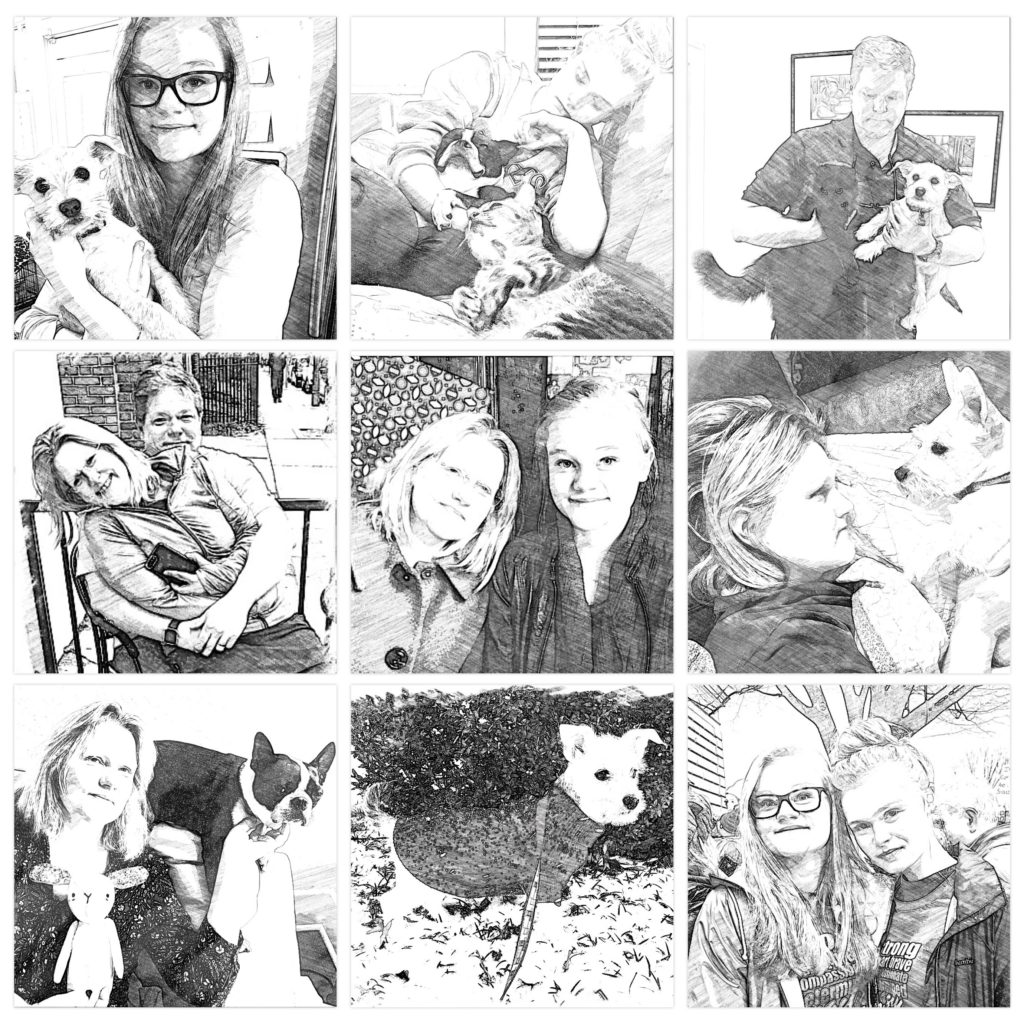
A great collage App to use is Pic Collage. I’ve also used, PicsArt, but after awhile, the ads on this App get very annoying. Both Apps are very easy to use. At this point, I am not concerned about the size of the Photo-Design block (recall it needs to 5″). It just needs to be square. Hence we use a square shaped photo collage. Also leave some space in between the Photo-Designs, as you’ll need this for when you cut the Photo-Designs into individual blocks.
Recall that for this Quilt, you will need twenty-five 5″ Photo-Design blocks. But since we’re printing 9 blocks at a time, go ahead and have 27 Photo-Designs ready (You can use the extra two for a pillow!). This means you will create 3 different collages, each with 9 Photo-Design blocks for a total of 27 Photo-Design blocks (3 x 9 +27). Then you will upload from your smart phone or iPad, the collages to Spoonflower.
The next post will be Step Two – Uploading the Photo-Design collages to Spoonflower. And then after that post, there will be one more post, Step Three – Making the Quilt.


Comments are closed.